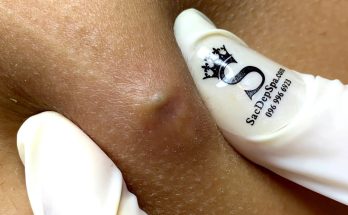
TREATMENT OF Epidermal Cyst on Back IS COMMITTED TO NOT RECURRING, NOT LEAVING SCARS

TREATMENT OF Epidermal Cyst on Back IS COMMITTED TO NOT RECURRING, NOT LEAVING SCARS

TREATMENT OF Epidermal Cyst on Back IS COMMITTED TO NOT RECURRING, NOT LEAVING SCARS

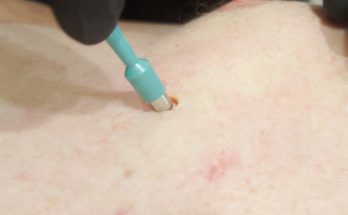
The treatment of an epidermal cyst on the back involves several steps to minimize recurrence and scarring. Here’s an approach focused on ensuring effective removal while minimizing the chances of the cyst coming back and leaving visible scars:

1. Consultation and Diagnosis

  • Medical Evaluation: The first step is to consult a dermatologist or a healthcare professional to confirm that the cyst is an epidermal cyst (often caused by blocked hair follicles or oil glands).
  • Pre-treatment Assessment: The doctor may assess the size, location, and depth of the cyst to determine the most appropriate treatment method.

2. Minimizing Recurrence

  • Complete Excision: The most effective way to prevent recurrence is to completely remove the cyst wall along with the contents. If any part of the cyst wall remains, it can regrow over time.
  • Laser Treatment: Some patients opt for laser-assisted excision, which can be more precise and may help reduce the risk of recurrence.

3. Minimizing Scarring

  • Proper Technique: The surgeon or dermatologist should use a precise excision technique, ensuring that they cut along the natural skin lines to minimize visible scarring. A well-done excision will often result in a less noticeable scar.
  • Sterile Environment: Performing the procedure in a sterile environment reduces the risk of infection, which could worsen scarring.
  • Sutures: In some cases, suturing the wound with dissolvable or fine stitches can help the wound heal neatly, reducing scarring.
  • Post-Treatment Care: Proper aftercare is crucial to minimizing scarring:
    • Keep the wound clean and dry: Follow instructions for cleaning and changing the dressing to prevent infection.
    • Avoid sun exposure: Protect the healing area from direct sun exposure, which can lead to hyperpigmentation or darkening of the scar.
    • Use topical treatments: Products like silicone gel sheets or scar creams may be recommended to help reduce scarring. Some people use Vitamin E, though its effectiveness is debated.

4. Follow-up Care

  • Regular Check-ups: After removal, follow-up visits with the healthcare provider will help ensure proper healing and check for any signs of recurrence.
  • Monitor for Infection: Signs of infection, such as increased redness, swelling, or pus, should be treated promptly to avoid complications that can worsen scarring.

By carefully choosing a skilled provider and following these steps, it’s possible to effectively treat an epidermal cyst while minimizing both recurrence and scarring.

TREATMENT OF Epidermal Cyst on Back IS COMMITTED TO NOT RECURRING, NOT LEAVING SCARS Read More
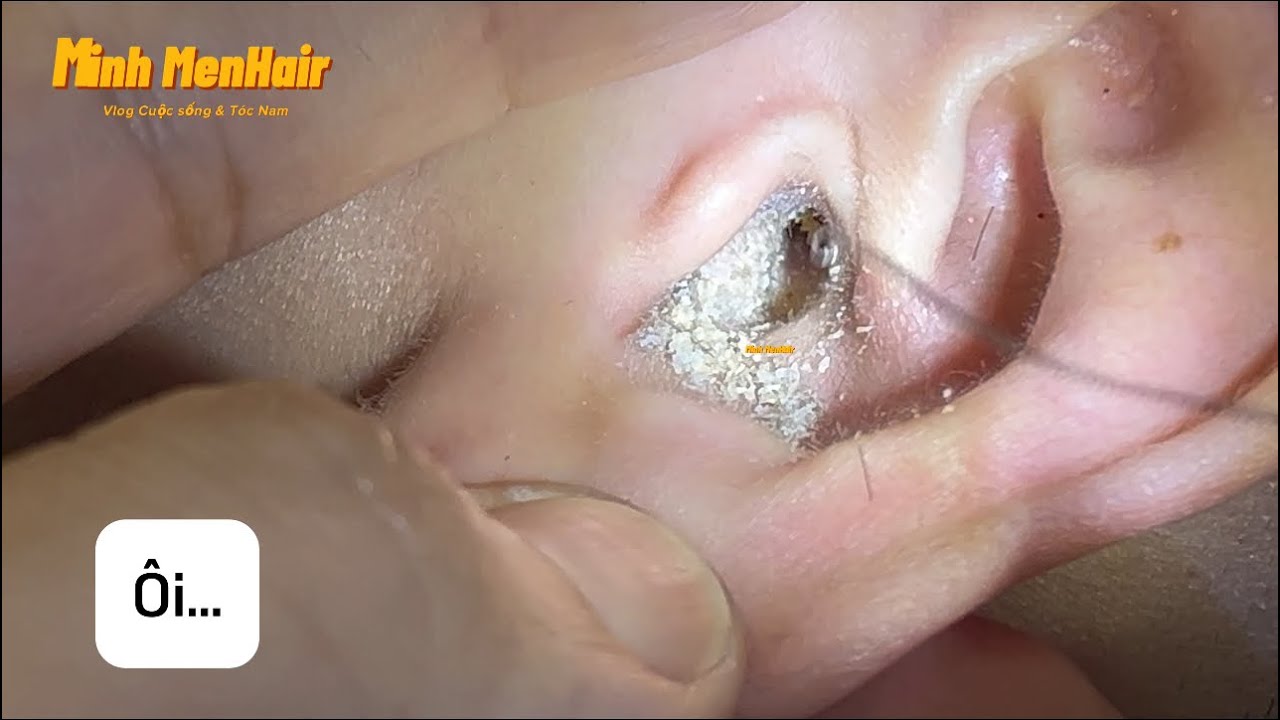
How to get earwax out of your ear

How to get earwax out of your ear

How to get earwax out of your ear

We include products we think are useful for our readers. If you buy through links on this page, we may earn a small commission. Here’s our process.

How we vet brands and products

People should not poke anything into the ear to remove earwax, but gently dripping hydrogen peroxide, ear drops, or baby oil into the ear will soften the wax, which may cause it to come out.

Earwax, also called cerumen, serves an essential function in the body. It helps remove dead skin cells, dirt, hair, and other debris from the ear canal. It lowers the risk of infection and prevents the ear canal from feeling uncomfortable and itchy. It also helps reduce the irritation that water causes when it enters the ear canal.

However, it is possible for the body to overproduce earwax, allowing it to build up and block the ear canal.

A blockage can occur if a person cleans their ears using a cotton swab, which can push the earwax further into the ear canal. This may also happen if a person is using a hearing aid.

The medical term for an earwax blockage is a “cerumen impaction.” People can usually treat this condition at home using simple household products.

Treatments and home remedies

There are several ways to deal with an earwax blockage at home, including:

Hydrogen peroxide

A common method for earwax removal is to add a few drops of hydrogen peroxide to a damp cotton ball and apply it to the affected ear. Hydrogen peroxide is a commonTrusted Source antiseptic. A person can also use a clean eyedropper to drip the solution into the ear canal.

It is essential to tilt the head so that the affected ear is pointing upward for several minutes. This will allow the fluid to drip down into the ear canal to reach the blockage.

After a few minutes, tilting the head the other way will allow the fluid and earwax to drain until the ear canal is clear.

In one article, researchers noted that a person should apply hydrogen peroxide to the earwax about 30 minutesTrusted Source prior to ear irrigation. The solution can loosen up the earwax to make removal with water irrigation easier.

A person should use some caution when using pure solutions of hydrogen peroxide or drops made with the solution. At low concentrations typically found in readily available household products, hydrogen peroxide can cause skin irritation. At concentrations of 10% or higher, it can cause burns on the skin.

If irritation occurs, a person should discontinue use and talk with their doctor if their symptoms get worse.

A person should use hydrogen peroxide only if their eardrum is intact. If it is perforated or a person has had ear tubes inserted, this will cause pain.

Rubber ball syringe

A similar method is to use a rubber ball syringe with warm water. A person should have the affected ear pointing upward and use the syringe to drip warm water slowly into the ear canal.

It is vital to avoid forcefully flushing the water into the ear canal, as this can cause dizziness. The water must not be too hot or too cold.

After a minute, the person should tilt their head the other way so that the fluid and earwax can drip out. They may find that pulling up slightly on their ear may help with allowing the water to drain out.

It may be necessary to repeat this process multiple times. Anyone who has an ear injury, such as a ruptured eardrum, should not use this method. People who frequently get swimmer’s ear should not use this method.

Ear drops

It is possible to purchase ear drops over the counter (OTC) or online to treat an earwax blockage. These are usually water- or oil-based solutions that soften the earwax. They often contain carbamide peroxide, which is similar to hydrogen peroxide.

To use an OTC solution, people should follow the instructions on the packaging. Usually, they will need to apply between 5 to 10 drops of the solution to the affected ear twice per day for several days until the ear canal is clear.

If the ear drops do not completely remove the earwax, a person may need to combine the treatment with the warm water and rubber syringe to flush or irrigate the ear. If the problem persists past 4 days, a person should talk with their doctor.

Other household remedies

Using an eyedropper, it is also possible to apply other substances. According to a 2018 article, other products that can work to help clear wax include:

  • baby oil
  • saline
  • almond, arachis, or rectified camphor oil
  • almond or mineral oil
  • sodium bicarbonate, 10%
  • glycerin
  • acetic acid, 2.5%

The same article warns against using olive oil drops or sprays, cotton-tipped swabs, or ear candling.

Again, a person should apply one or two drops with the affected ear facing upward, wait a few minutes, then tilt the head the other way to allow the fluid to drain out. As with other remedies, a person should not put any of these in their ear unless their eardrum is intact or the treatment is approved by a doctor.

Should you use ear candles?

People should avoid using ear candles to treat earwax blockages.

Using ear candles is also known as ear coning or thermal-auricular therapy. It involves covering a hollow fabric cone in wax or paraffin, inserting it into the ear of a person lying on their side, and then lighting it. A paper plate protects the skin by catching any dripping wax.

The theory is that ear candling creates suction to pull the earwax out of the ear.

According to a 2016 study, a person should avoid ear candling and opt for safer methods to remove earwax buildup. The American Academy of Otolaryngology–Head and Neck Surgery Foundation also warns against the use of ear candles, citing that the Food and Drug Administration (FDA) has removed several products from the market due to safety concerns.

There are safer and more effective methods of treating earwax blockages, so a person should not attempt to use ear candles.

Is it safe?

When done properly, following all instructions on home kits or from a doctor, a person can safely remove earwax at home.

However, several groups of people should avoid using any method to remove earwax at home. Some people who should not useTrusted Source home remedies or OTC kits include those who:

  • cannot sit upright or who are unable to sit still
  • have a foreign body stuck in the ear
  • have had ear surgery or inner ear issues
  • have a hole or tear in the ear drum
  • get swimmer’s ear
  • have severe swimmer’s ear
  • have a history of middle ear disease
  • have had radiation in the area

If a person has any doubts, they should talk with their doctor instead of attempting to clean out their earwax at home.

How to use an earwax removal kit

Earwax removal kits or irrigation systems can vary slightly, based on the active ingredients and the exact device used. A person should follow all instructions on the box and from their doctor before using the kit.

In general, a person will likely take these steps to clean their earwax using irrigation or a home kit system, per a 2021 articleTrusted Source:

  1. A person should find a comfortable chair to sit upright in and tilt their head to the side, then place a few drops of warm water, saline, hydrogen peroxide, or the provided solution in the kit into the ear.
  2. They should then sit with their head tilted to the side for about 15 to 30 minutes.
  3. After the solution has soaked into the earwax, the person should use the provided device to suck the solution into the bulb or flush the ear wax from the ear.
  4. When finished, the person should dry the surrounding area.

If any issues occur, a person should see their doctor as soon as possible.

Symptoms

The most commonTrusted Source symptom of earwax blockages is a temporary hearing problem or hearing loss. This may be worrying, but usual hearing should return upon removal of the blockage.

Other symptoms may include:

  • pain in the ear
  • tinnitus, or ringing in the ear
  • dizziness
  • a feeling of fullness in the ear
Prevention

Inserting cotton buds or other objects into the ear in an attempt to clean it can actually cause or worsen an earwax blockage. This is because the objects push the earwax further down into the ear canal.

To prevent earwax blockages, a person should avoid sticking anything into their ear. Earwax may seem unpleasant, but cleaning is not usually necessary. The ears are actually self-cleaning and should push most wax out.

If the body is producing excessive amounts of earwax, people can buy OTC ear drops to deal with the problem safely.

Another method of preventing earwax blockages involves a person placing drops of a solution into their ears a few times per month to help soften the earwax. People can choose from a range of products online, including:

  • earwax removal drops
  • mineral oil
  • hydrogen peroxide

Regularly irrigating the ear may help prevent earwax buildups, but it is usually best to save this for treating an actual blockage. A person should never irrigate the ears of young children without talking with a doctor first.

When to see a doctor

People can treat most earwax blockages at home. However, the ear canal and eardrum are delicate, so it can be safer to visit a doctor for earwax removal.

People should also see a doctor if they have bleeding or drainage from the ear or are in significant pain, as another issue may be causing the symptoms.

Anyone with concerns about impacted cerumen in a young child should make an appointment with a pediatrician. They will be able to check the child’s ears and recommend treatment options.

A doctor may remove the blockage using specialized ear instruments.

A person may need to see their doctor after a few days if symptoms persist or get worse with home treatment.

Frequently asked questions

Here are some frequently asked questions about earwax removal.

Is it OK to put hydrogen peroxide in your ear?

Hydrogen peroxide may help with earwax removal. A person can apply the hydrogen peroxide to a cotton ball and then gently apply it to the ear. They may also apply the drops directly with a dropper.

What dissolves earwax fast?

A few drops of hydrogen peroxide can help soften earwax within 30 minutesTrusted Source. After applying the hydrogen peroxide, a person will need to tilt their head one way for several minutes and then tilt it the other way. This is to ensure that the fluid drips down into the ear canal to reach the blockage before draining it out.

How can I remove earwax at home?

Various home remedies can help remove earwax at home. These include hydrogen peroxide, warm water with a rubber ball syringe, and ear drops.

Will earwax go away on its own?

In most cases, earwax will fall out on its own. However, if a person has symptoms of an earwax blockage, such as hearing loss and ear pain, it may be necessaryTrusted Source to remove the earwax. It is best for a person to contact their doctor if the blockage persists after a few days, the ear becomes painful, or the person is a child.

How to get earwax out of your ear Read More
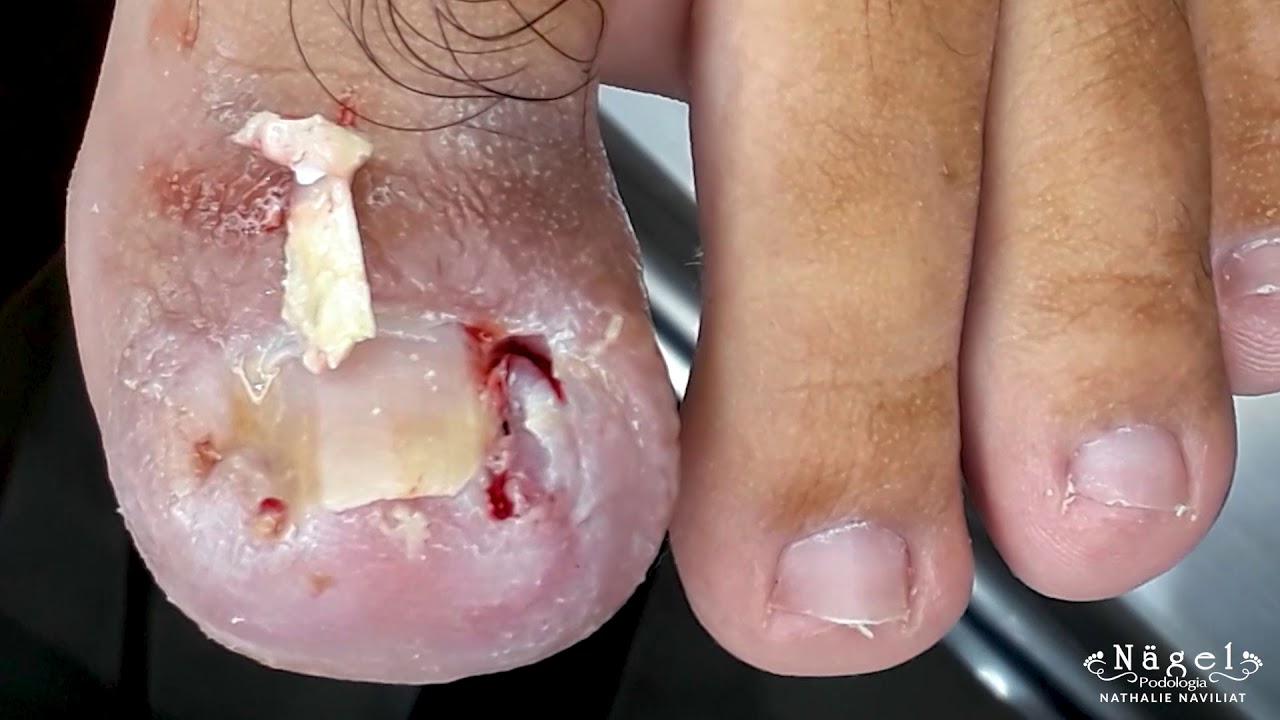
SHOCKING SCENES | DEEP AND TRAUMATED NAIL

SHOCKING SCENES | DEEP AND TRAUMATED NAIL

Nail Matrix Function and Anatomy

The nail matrix is the area where your fingernails and toenails start to grow. Located at the base of the nail, it creates new cells that allow your nail to grow. Your nail may stop growing if the nail bed is injured.

The matrix creates new skin cells, which pushes out the old, dead skin cells to make your nails. As a result, injuries to the nail bed or disorders that affect the matrix can affect your nail growth.

Share on Pinterest
Nail anatomy

Regarding the nail’s anatomy, it’s important to consider what you see and what you don’t. If you look at the top of the nail, you’re looking at the nail plate. Underneath the nail plate is the nail bed. The nail bed is where the nail adheres to the finger.

Other key elements of the nail include:

  • Lunula. The white, half-moon cells at the nail’s base. Some people can only see the lunula on their thumbs while others cannot see theirs at all.
  • Sterile matrix. This is the area of the nail above the lunula. The nail typically changes color beyond the germinal matrix (see below) as it extends to the sterile matrix because cells no longer have nuclei after that time, which makes the nail appear more transparent. This area is the next most common place where nail cells are made. Fingertip skin is connected to the sterile matrix.
  • Germinal matrix. This is the area of the nail below the lunula (closest to the knuckle). An estimated 90 percent of nail production comes from the germinal matrix. This gives a natural curvature to the nail.
  • Perionychium. The structures that surround the nail plate.
  • Cuticle. The area of skin where the nail grows out of the finger. It provides protection to the nail matrix.

Your nails typically grow around 3 to 4 millimeters a month. Some people’s nails grow faster, including younger people and those with longer fingernails.

Injuries and medical conditions impacting the nail matrix

The nails are intended to provide protection to fingers as well as aid in opening, scratching, and tearing. Just like other body areas, they’re subject to injury and disease. The following are some conditions that can affect the nail matrix.

Trauma

An estimated 50 percentTrusted Source of fingernail injuries are due to a broken finger. Trauma to the nail can cause the production of new nail cells to stop for as long as three weeks.

Nail growth will usually resume at a faster rate and steady after about 100 days. You may notice the nail appears thicker than usual.

The extent of the injury often depends on where it occurs. If you have a deep cut or trauma to the germinal matrix at the base of the nail, it’s possible the nail may never grow back.

Ingrown nail

An ingrown nail occurs when a nail grows into the skin of the finger or toe, usually due to being cut too short. However, trauma to the nail and wearing tight shoes can also cause ingrown nails.

Symptoms include a swollen and tender nail. Sometimes, this area can get infected and will be red, painful, and sore.

Melanonychia

Melanonychia is a condition that causes brown pigmentation irregularities in the nail. Those who have dark skin are more likely to have it. This irregularity appears as a brown or black vertical stripe up the nail plate.

Melanonychia is a broad descriptive term that can indicate a normal variation on nail color or something as serious as subungual melanoma (see below). Several conditions and events can cause melanonychia, including:

  • nail biting
  • psoriasis
  • pregnancy
  • Cushing syndrome
  • chemotherapy medications
  • nail infection

Subungual melanoma

Subungual melanoma (or nail matrix melanoma) is a condition where cancerous cells grow in the nail matrix. The cancerous cells can cause changes in pigments in the nail known as melanin. As a result, a distinct striped discoloration can grow from the nail matrix.

If you observe changes to your nail that aren’t explained by trauma, talk to a doctor to ensure they’re not due to subungual melanoma.

Pterygium

Pterygium unguis is a condition that causes scarring that extends to the nail matrix. It causes the nail fold where the fingernail usually goes over the fingertip to fuse to the nail matrix. The nails take on a ridged appearance on the nail plate.

Lichen planus, burns, and lupus erythematosus cause pterygium.

Nevomelanocytic nevus

A nevomelanocytic nevus is essentially a mole or collection of melanocytes under the nail matrix. It’s possible to have one from birth, or acquire one following nail trauma or due to aging.

The challenge with a nevomelanocytic nevus is that it’s hard to tell the difference between a non-harmful nevus and discoloration that indicates cancer.

Paronychia

Paronychia is an infection of the fingernails or toenails. This condition may be acute or chronic, which can lead to nail deformities. Paronychia symptoms include swelling, redness, pain, and pus-filled areas in or around the nail. Fungus or bacteria can cause paronychia.

Dystrophic onychomycosis

Dystrophic onychomycosis is a fungal skin infection that causes total destruction of the nail plate. The condition usually occurs when a person has had a severe fungal nail infection for some time and goes untreated or isn’t fully treated.

Some common causes of dystrophic onychomycosis include:

  • psoriasis
  • lichen planus
  • contact dermatitis
  • trauma
JOIN NOW
HEALTHLINE NEWSLETTER
Get our free anti-inflammatory recipes

We rounded up a few nutritious and anti-inflammatory recipes for you to try next time you need inspiration in the kitchen. Join our psoriasis newsletter for your free recipes and expert guidance twice a week.

Diagnosing issues

A doctor can diagnose some nail concerns by a visual examination and listening to a description of symptoms. This is true for many fungal nail infections with nail crumbling, itching, and redness around the nail.

However, some conditions may warrant further work-up. This includes obtaining a specimen of the nail, either by clipping a portion of the end or performing a nail matrix biopsy.

Nail matrix biopsy

In a nail matrix biopsy, a doctor takes a sample of a nail matrix to examine for irregular cells, such as cancer. Because the nail matrix is deep at the nail’s base, doctors usually perform this procedure under local anesthesia.

A doctor can strategically inject local anesthetic into the finger’s base, numbing the finger. You shouldn’t be able to feel pain, only pressure, when a doctor removes a portion of the nail’s matrix. The approach to the biopsy depends on what area the doctor is testing.

Takeaway

The nail matrix is responsible for nail growth. It can be vulnerable to damage and disease. Seeing a doctor as soon as discoloration, pain, swelling, or other symptoms occur can ideally ensure you are treated as quickly as possible.

SHOCKING SCENES | DEEP AND TRAUMATED NAIL Read More
Relax And Very Satisfying With The Deep Extraction Part13

Relax And Very Satisfying With The Deep Extraction Part13

“If topical treatment alone does not improve acne, or if acne is severe or extensive, oral medications are the best option. If you’ve tried several topical medications without success, or if your condition is severe, oral acne medications are usually the next step in the treatment process. Treatment usually includes oral antibiotics and applying a prescription gel or topical cream to the skin. Depending on people with acne, treatment may include using prescription creams to prevent acne, taking antibiotics to kill bacteria that contribute to acne, or, if acne is severe, taking stronger medications such as like isotretinoin, or even minor surgery. Even if you have tried topical acne treatments such as creams or gels without any lasting results, laser therapy may be the right solution for you. While I would like you to try natural remedies first, if you are not seeing improvement and severe hormonal acne is making your quality of life worse, other treatments can make a real difference. While it may take a while, treating hormonal acne from the inside out until your hormones are in their natural, happy balance will allow your skin to truly heal.

While my approach isn’t an instant solution, and won’t replace everyone’s multi-drug regimen, hormonal acne can be very sensitive to a more holistic approach, which means less medication and more patches. While the studio treatments offered by Carolina Skin Care can be very effective in treating acne, patients should also commit to taking care of their skin at home. Multiple topical treatments, whether it’s steroids for eczema or topical antibiotics for acne, topical treatments may help in the short term, but in the long run, it can damage the skin, making you more likely to take it in the future. In addition to other treatments, you can take the most obvious step to soothe stress-related acne: reduce stress. If the creams and antibiotics you have been prescribed are not working, or if you cannot tolerate the side effects that medications may cause, you may want to consider acne treatments, which can be provided at your doctor’s office. Other treatments include birth control pills to control acne, hormonal drainage and extraction, and laser and phototherapy.”

Relax And Very Satisfying With The Deep Extraction Part13 Read More
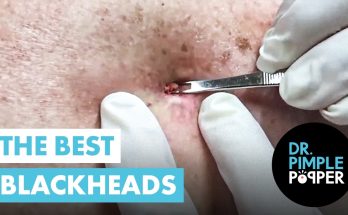
The Best Blackheads

The Best Blackheads

How to Get Rid of Blackheads

Blackhead Treatment
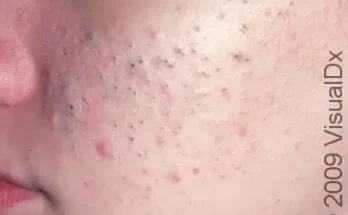
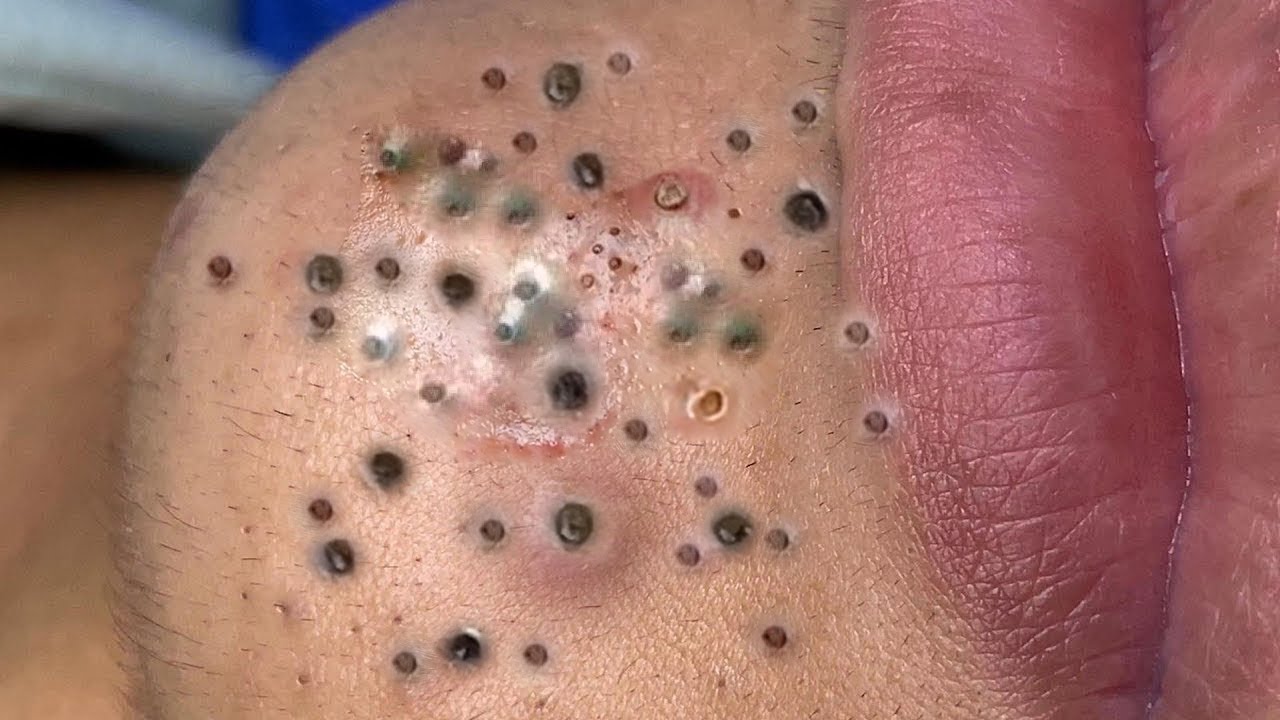
If you get blackheads — a type of acne that happens when dead skin cells and oil clog your pores — you have plenty of methods to treat them. There are also ways to prevent new ones from forming.

But remember: Picking, squeezing, and popping blackheads aren’t among your options. That approach could make your situation a lot worse. Try some of these treatments instead.

Salicylic acid

Salicylic acid is a popular over-the-counter ingredient in many skin cleansers. It breaks down dead skin cells and extra oil before they can clog your pores.

When you go to the pharmacy, check the ingredient labels carefully. You’ll find products with salicylic acid that range in strength from 0.5% to 5%. The acid can be harsh on some people’s skin. You might want to put it on every other day, rather than daily, to see how your skin reacts.

As for other acne-fighting ingredients, blackheads don’t contain bacteria, so benzoyl peroxide — a powerful antibacterial against most other forms of acne — may or may not help.

Retinoid creams and lotionsRetinoid creams and lotions, which are made from vitamin A, can unclog your pores. They also help your body make new skin cells.

You can buy some retinoids over the counter in drugstores, but you’ll need a prescription for most. Because retinoids make your skin more sensitive to UV rays, you should use these creams and lotions before bed and out of the sun.

Extraction

“Extraction” might sound scary, but many health professionals know how to remove unsightly blackheads with specialized tools.

You can find home extraction kits in stores. But most medical experts repeat that classic advice: “Don’t try this at home.” A DIY procedure can cause scarring, even if you think you know what you’re doing.

Chemical peels

A chemical peel is usually for people who want to improve the appearance of sun damage and minor scars, but it may help with certain types of acne. The procedure can unclog pores and start up new skin growth.

You get a chemical peel in your doctor’s office. It removes cells from the top layer of your skin.

Common ingredients in chemical peel products are salicylic, glycolic, and retinoic acids. Because the process uses acid, it can cause redness, crusting, scarring, infection, and skin discoloration.Skin brush 

A skin brush can help get rid of the built-up debris that contributes to acne. It can also slow the signs of aging. You should always rehydrate your skin after using a skin brush.

There are many different skin brushes available to buy. Your dermatologist can tell you if using one may be right for you. They can also tell you what kind to use and how to use them correctly. If you don’t use them the way you should, it can make acne worse.

Noncomedogenic products

Most noncomedogenic products don’t contain any oil and don’t block your pores. That lowers your risk of getting blackheads.

You should be able to find cleansers, moisturizers, and makeup that are non-comedogenic.

To prevent blackheads, try tips such as:

  • Wash your face when you get up, before bed, and after you sweat.
  • Put non-abrasive cleaners on your skin gently, using your fingertips. Scrubbing with washcloths or sponges can irritate the skin.
  • Use alcohol-free skin products.
  • Avoid the sun since some acne medicines can make your skin more sensitive to UV rays.
  • Shampoo oily hair regularly.
  • Limit how many times you touch your face.
  • Change pillowcases often.

Also, some studies suggest certain foods can worsen acne. A few of the suspects are skim milk, chocolate, and carbohydrate-rich foods like bread and chips.

Certain treatments won’t work for blackheads. You should avoid oil-based and alcohol-based cleaners.

If you have oily skin, products that have these ingredients can irritate your skin.

If you have normal skin, moisturizers that contain some light oil should be fine. If you have dry skin, oil-based moisturizers may help.

The Best Blackheads Read More
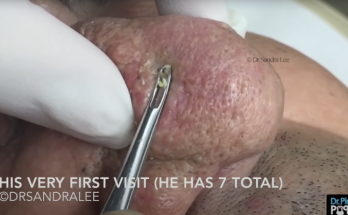
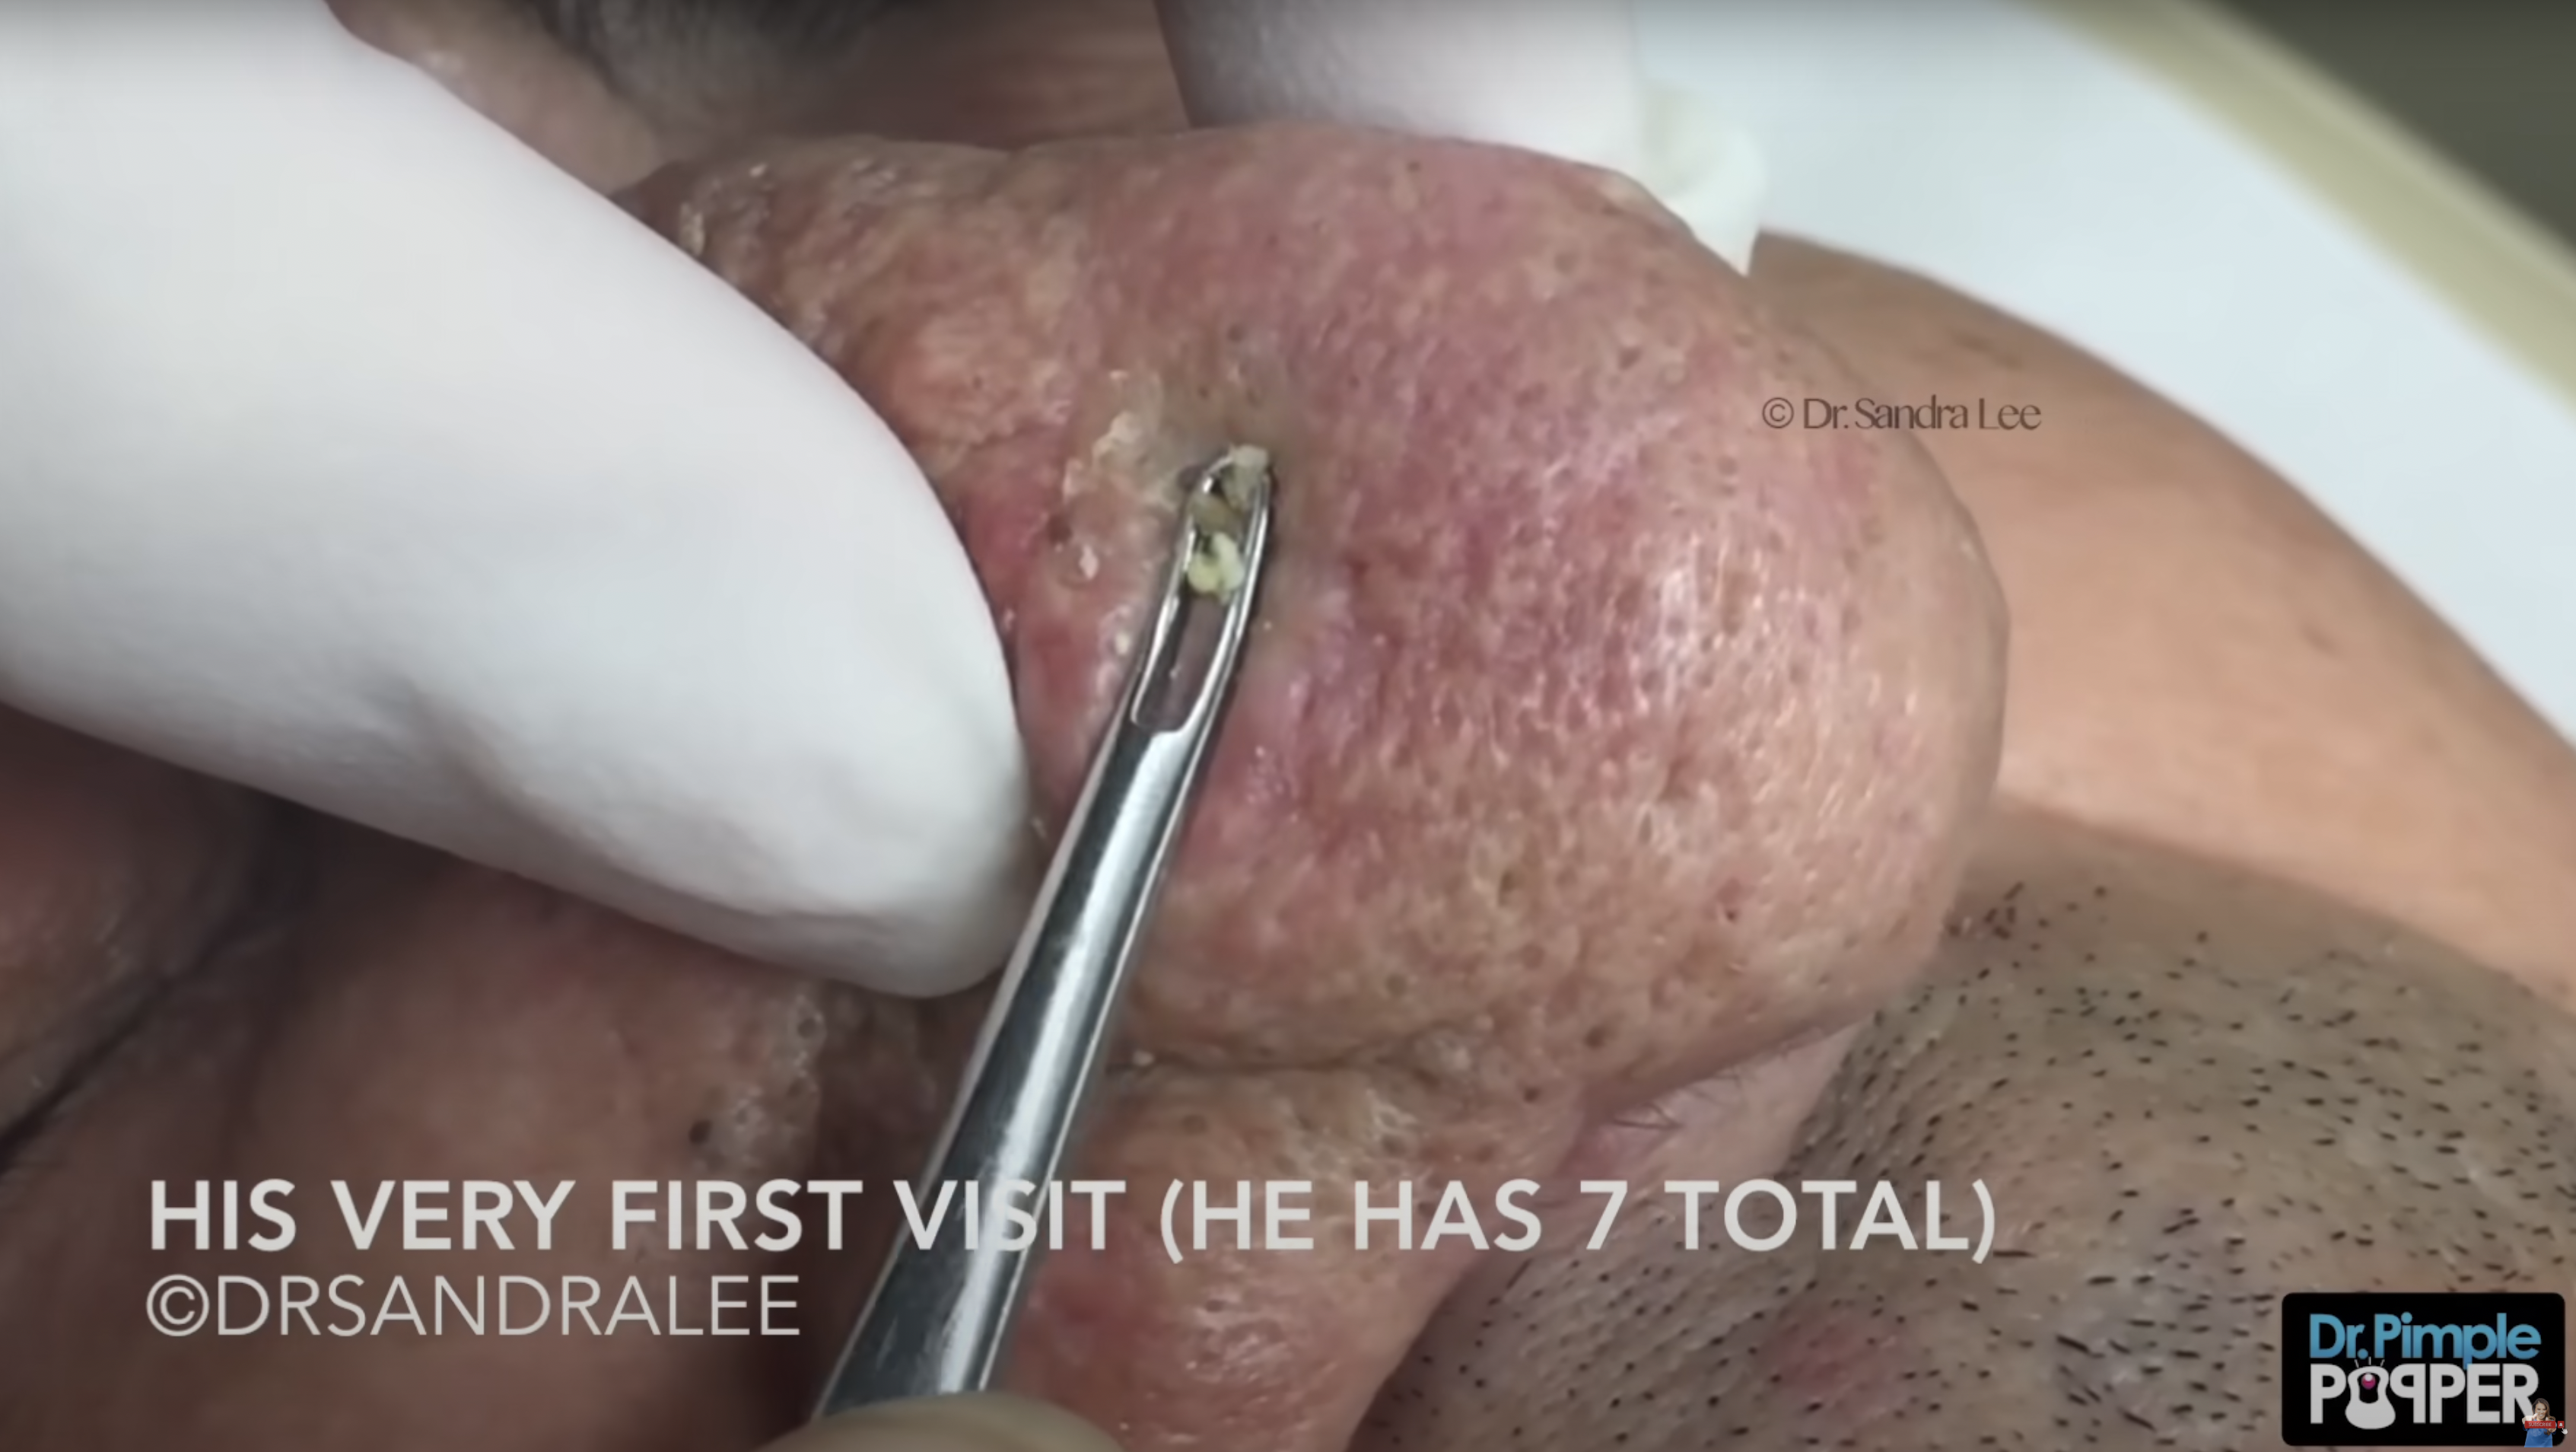
The Nose Knows: Part I “Mr. Wilson’s” Blackhead Extractions

The Nose Knows: Part I “Mr. Wilson’s” Blackhead Extractions

How to Get Rid of Blackheads on the Nose, According to Dermatologists

Woman applying pore strips on nose in bathroom
MarsBars / Getty Images 
Key Takeaways
  • Blackheads are one of the most common forms of blemishes associated with acne that can occur on the face, nose, neck, back, and chest.
  • Many things can cause blackheads to form, including increased oil production, hormones, and the presence of bacteria on the skin.
  • To get rid of blackheads on the nose, experts recommend washing your face twice daily, using non-comedogenic skin care products, and avoiding squeezing blackheads.

Many of us have dealt with some form of acne at one point or another. After all, it is one of the most common skin conditions in the United States, affecting nearly 50 million Americans each year.1

In particular, blackheads also known as open comedones can be one of the most frustrating types of blemishes associated with acne because no matter how much scrubbing, cleansing, and exfoliating you may do, they don’t seem to go away.

According to Kellie Reed, MD, a board-certified dermatologist at Westlake Dermatology in Austin, Texas, blackheads can occur when pores on the face become clogged with oil, debris, or dead skin cells.

Genetics, hormonal factors, bacteria on the skin, and diet are other things that can cause blackheads to form as well, Reed told Verywell.

Blackheads can affect the face, neck, back, and chest, however, they most commonly occur on the nose due to the number of pores, hair follicles, and oil production in that area as well as the natural size of the pores, Anna Chien, MD, associate professor of dermatology and vice chair for Quality, Safety & Service at the Johns Hopkins School of Medicine, told Verywell in an email.

In some cases, blackheads can be deeply rooted into the pores, making it difficult to remove and often requiring the assistance of prescription grade products and/or a professional to extract them, Reed said.

Even though these pesky blemishes can be a pain to get rid of, there are some remedies you can try to treat them. Here’s how, according to dermatologists.

How to Get Rid of Blackheads on the Nose 

Instead of picking or trying to squeeze your blackheads out, experts say there are home remedies, over-the-counter medications, and professional treatments that may help remove blackheads safely and naturally.

Home Remedies 

  • Green tea is a great antioxidant that can help reduce oil production in your skin.2 Mix green tea leaves with water and massage the leaves into your skin for about 30 seconds. Rinse off and apply a moisturizer afterward.
  • Tea tree oil is another natural way to stop the growth of bacteria and can be found in many products, including soaps and creams.3 Apply tea tree oil directly to affected blackheads to prevent bacterial growth.
  • Salt/sugar scrubs can help exfoliate the skin and remove dead skin cells on the skin’s surface. After massaging the scrub on your face, wash it off with water and apply a moisturizer.
  • Baking soda just like salt and sugar scrubs can help exfoliate the skin and remove dirt, oil, and dead skin cells. Mix baking soda with water and massage it into any affected areas. Rinse off with warm water and use a moisturizer when done.

Over-The-Counter Treatments and Medications 

  • Azelaic acid can be found in topical creams and works by killing bacteria on your skin. This over-the-counter treatment can also reduce inflammation and keep the pores clean.
  • Salicylic acid is an ingredient found in many cleansers, lotions, and creams. When it’s applied to the skin, it helps shed dead cells which can prevent pores and follicles from clogging.
  • Benzoyl peroxide is another ingredient found in many over-the-counter products that work by lowering the amount of acne-causing bacteria on the skin.
  • Topical retinoids can help prevent blackheads by decreasing oil production in oil glands and helping clear out clogged pores.

Professional Treatments 

  • Chemical peels contain certain acids like salicylic acid and beta hydroxy acid (BHA)s that help unclog pores and remove blackheads from the surface of the skin.
  • Prescription-strength treatments are prescribed by a healthcare provider that works similarly to over-the-counter topical treatments like retinoids, however, they are stronger.
  • Oral acne medications that are prescribed by a healthcare professional can help reduce bacteria that may cause blackheads.
  • Professional facials and removals or microdermabrasion treatments can remove dead cells and sebum that cause blackheads. A trained professional like an esthetician can extract blackheads safely during a facial treatment.

While certain methods and treatments like topical retinoids and other over-the-counter products can reduce oil production and help remove blackheads, using too much of any product can lead to dryness of the skin, redness, irritation, inflammation, or flakiness, Lindsey Bordone, MD, a board-certified dermatologist in the Department of Dermatology of Columbia University Medical Center, told Verywell in an email.

Methods and Treatments to Avoid

If you are trying to get rid of blackheads, especially on the nose, one of the biggest things you should avoid doing is squeezing them out of the skin or popping them, Chien said. While it can be tempting to squeeze them out yourself, you should leave it to the professionals to extract them, if needed.

“Excessive manipulation (squeezing, popping, etc,) should be avoided as it can lead to more inflammation and increase the risk for discoloration and scarring,” Chien added. “Excessive scrubbing and exfoliating should also be avoided.”

In addition, people should consider avoiding the use of pore strips because these products may cause more irritation than good, Reed said. “They often target surface debris and do little to resolve the deeper blackheads.”

How To Prevent Blackheads 

Despite hormonal changes, genetics, and diet, Reed and Chien said there are some things you can do to prevent blackheads from forming. Here are some things that may help:

  • Wash your face daily at least two times a day with a gentle or mild facial cleanser to remove oil, dirt, and other debris.
  • Exfoliate two or three times a week to help remove dead skin cells from the surface of your skin.
  • Use an oil-free moisturizer and sunscreen regularly to keep the skin hydrated without having to deal with excess oil production that can cause clogged pores.
  • Swap out your products for non-comedogenic ones to avoid clogging the pores which can lead to the production of more blackheads.
  • Remove makeup at the end of each day to avoid irritation from makeup products and to reduce the risk of clogged pores from oil, dirt, and dead skin buildup.
  • Avoid touching or picking your face to prevent the spread of oil and bacteria from your hands.
  • Rinse your face after any sweating to prevent dead skin cells and bacteria from getting into your pores.

When to See a Dermatologist 

If you are following specific measures like washing your face daily and using certain over-the-counter medications, but they are not helping and you are not noticing any changes in your condition, it could be time to see a dermatologist for evaluation, Bordone said.

You should also schedule an appointment with a dermatologist if your condition is progressing and worsening, or if you are experiencing other symptoms such as increased inflammation, discoloration, or scarring of the skin, Chien said.

A professional can help manage your blackheads, provide other treatment options, such as prescription strength topicals, and in some cases, help remove them.

What This Means For You

Several methods and treatments can help get rid of blackheads. Experts recommend using over-the-counter treatments and medications like salicylic acid or benzoyl peroxide and maintaining a good and gentle skin care routine. If you don’t see an improvement or your blackheads worsen, it may be time to see a dermatologist.

The Nose Knows: Part I “Mr. Wilson’s” Blackhead Extractions Read More
Drainage of Infected Epidermal Cyst

Drainage of Infected Epidermal Cyst

Minimal Excision Technique for Epidermoid (Sebaceous) Cysts

oid cysts are asymptomatic, dome-shaped lesions that often arise from a ruptured pilosebaceous follicle. The minimal excision technique for epidermoid cyst removal is less invasive than complete surgical excision and does not require suture closure. The procedure is easy to learn, and most physicians experienced in skin surgery can perform the procedure after three to five precepted sessions. It involves making a 2- to 3-mm incision, expressing the cyst contents through compression and extracting the cyst wall through the incision. Gauze or a splatter shield should be used to protect the physician from spraying of cyst contents. The rarity of associated cancer makes histologic evaluation necessary only if unusual findings or clinical suspicion of cancer is present. Inflamed cysts are difficult to e excise, and it is often preferable to postpone excision until inflammation has subsided.

Epidermoid cysts are asymptomatic, slowly enlarging, firm-to-fluctuant, dome-shaped lesions that frequently appear on the trunk, neck, face, scrotum or behind the ears. Occasionally, a dark keratin plug (a comedo) can be seen overlying the cyst cavity. These epithelial, walled cysts vary from a few millimeters to 5 cm in diameter. The cysts are mobile unless fibrosis is present.

The term “sebaceous cyst” has fallen into disuse; current terms include epidermal cyst, keratin cyst, epithelial cyst, and epidermoid cyst. Other types of cysts are included in Table 1. Epidermoid cysts often arise from a ruptured pilosebaceous follicle associated with acne. Duct obstruction of a sebaceous gland in the hair follicle can result in a long, narrow channel opening in the surface comedo. Other causes include a developmental defect of the sebaceous duct or traumatic implantation of surface epithelium beneath the skin.

The cysts contain keratin and lipid, and the rancid odor often associated with these cysts relates to the relative fat content, bacterial infection, or decomposition. Spontaneous rupture discharges the soft, yellow keratin material into the dermis. A tremendous inflammatory response (foreign-body reaction) ensues, often producing a purulent material. Scarring makes removal more difficult.

TABLE 1

Table Major Lesions in the Differential Diagnosis

EnlargePrint
Branchial cleft cyst Myxoid cyst
Dermoid cyst Parotid tumor
Favre-Racouchot syndrome Pilar cyst
Fibrous tissue tumor Pilonidal cyst
Gardner’s syndrome Preauricular cyst
Lipoma Steatocystoma
Median raphe cyst Thyroglossal duct
Milia

Most cysts are simple lesions, but a few special situations should be considered. Multiple epidermoid cysts (associated with lipomas or fibromas of the skin) and osteomas should be considered as part of Gardner’s syndrome, with associated premalignant colonic polyps. Dermoid cysts of the head often can be confused with epidermoid cysts, and attempted removal of a dermoid cyst can create a wound with Excision and closure of epidermoid cysts can be difficult if inflammation is present; it may be preferable to postpone excision until the inflammation has subsided. intracranial communication. Some cysts can be associated with basal cell and squamous cell carcinoma, and some authors advocate histologic evaluation of the wall of all removed cysts. The rarity of associated cancer makes routine histologic evaluation necessary only when solid tumors or unusual findings are present.

Cyst infection can develop spontaneously or following rupture. It is often unclear whether an inflamed cyst is infected, and many physicians prefer to treat these lesions with antibiotics, incision, and drainage. Excision and closure can be very difficult with inflamed cysts, and it may be preferable to postpone the surgical procedure until the inflammation has subsided (typically one week).

There are many surgical approaches to epidermoid cysts. While complete surgical excision can ensure removal of the sac and prevent recurrence, this technique is time-consuming and requires suture closure. The minimal excision technique has been proposed as a less invasive and successful intervention. The minimal excision technique involves a 2- to 3-mm incision, expression of the cyst contents, and extraction of the cyst wall through the incision. Vigorous finger compression is used to express the cyst contents and loosen the cyst wall from the surrounding tissues to facilitate removal of the sac. The tiny wound can be closed with a single suture, although most physicians do not close this opening. A variation of this technique uses a punch biopsy instrument to create the opening into the cyst.

Expression of the cyst contents through the small opening can cause the sebaceous material to spray across the surgery room. Gauze can be used to cover the area as compression is applied, or a clear adhesive splatter-control shield can be used to cover the site. Some practices require the use of protective eye wear for the procedure.

Simple incision and drainage of cysts frequently results in recurrence. Two iodine crystals can be placed in the center of the cyst and, during the next few weeks, the cyst will become dark brown and hard. This hard nodule can then be expressed from the skin. This simple technique is inexpensive, but the need for a follow-up visit and the length of time for lesion removal may make this technique less desirable to many patients.

Other Types of Epithelial Cysts

  • Pilar or Trichilemmal Cyst (Wen). These cysts occur predominantly on the scalp, are odorless and have less fat and more keratin than epidermoid cysts. They are very amenable to removal by the minimal excision technique.
  • Dermoid Cyst. These congenital cysts occur in the lines of cleavage and sublingually around the eyes and on the base of the nose. These cysts have a rancid odor. The lesions can extend intracranially, and a preoperative computed tomographic (CT) scan is recommended.
  • Milia. These 1- to 2-mm lesions can arise spontaneously or can be caused by trauma. A small nick in the epidermis with a no. 11 blade allows expression of the keratinaceous white kernel.
  • Steatocystoma Multiplex. These multiple, small, yellow, cystic nodules (a few millimeters in diameter) can be found on the trunk, upper arms, axillae and thighs. The multitude of lesions may preclude cyst removal.
  • Favre-Racouchot Syndrome. These multiple lesions on the face result from profound sun damage. The pilosebaceous openings stretch, and the orifices fill with keratin material, producing comedones and cysts.

Methods and Materials

EQUIPMENT

  • Nonsterile Tray for AnesthesiaPlace the following items on a nonfenestrated drape covering a Mayo stand:

    Nonsterile gloves and mask

    1 inch of 4 × 4 gauze soaked with povidone-iodine solution

    1 inch of 4 × 4 gauze

    5-mL syringe, filled with 2 percent lidocaine with epinephrine (Xylocaine with epinephrine) with a 30-gauge needle

    25-gauge, 1 ¼-inch needle (for anesthetizing beneath the cyst)

  • Sterile Tray for the ProcedurePlace the following items on a sterile drape covering a Mayo stand:

    Sterile gloves

    Fenestrated disposable drape

    Two sterile bandages to anchor the drape

    Three small-tipped hemostats (mosquito clamps)

    No. 11 blade

    Needle holder for suturing (if needed)

    Iris scissors

    Adson forceps

    2 inches of 4 × 4 sterile gauze

    Suture materials (if needed)

    Splatter control shield (if desired)

Some physicians use the nonsterile gloves that were used to administer the anesthesia for the removal of small or superficial cysts.

Procedure Description

1. The skin overlying the site is cleansed with povidone-iodine solution. The skin overlying the cyst and the tissue to the sides and beneath the cyst are anesthetized with 2 percent lidocaine with epinephrine.

2. A fenestrated drape can be placed on the patient, with the lesion beneath the fenestration. A no. 11 blade is used to create a stab incision into the center of the cyst. A small-tipped hemostat is placed into the cyst, the tips gently opened and compression applied to allow the cyst con tents to pass through the opening (Figure 1).

FIGURE 1.

EnlargePrint
Incision in the top of a cyst with a no. 11 blade. The cyst is squeezed to remove all of the cyst contents. A hemostat can be placed in the incision and the blades opened while the cyst is squeezed to facilitate removal of the cyst contents. 

3. The hemostat can be removed, and both thumbs are used to express the cyst contents. Gauze or a splatter shield can be used to shield the physician from splatter. The hemostat can be reinserted, if needed, to assist with passage of the sebaceous material.

4. Following vigorous and complete expression, the hemostat is reintroduced into the cyst cavity, and the capsule at the base of the wound is grasped and elevated. An attempt should be made to gently remove the entire sac through the small opening (Figure 2). The sac may break, and several pieces may need to be removed.

FIGURE 2.

EnlargePrint
After vigorous squeezing, removing the cyst contents and loosening the cyst wall from the surrounding tissue, a hemostat is placed in the wound, and the entire cyst wall is gently delivered through the small incision. 

5. At the end of the procedure, the wound should be inspected to ensure that all of the cyst wall has been removed. The cyst wall can be pieced together to provide additional confirmation of complete removal.

6. Direct pressure is applied to the site with gauze. Antibiotic ointment is applied and gauze is taped over the site. The patient is encouraged to hold direct pressure (using gauze) to the site for one to two hours following the procedure. Most small incisions do not require suture closure.

Follow-Up

Malignant growths may require a second procedure to provide a wider margin of excision around the original lesion. Rarely, malignancy may be detected at the site of the original surgery. Once the cyst contents have been squeezed out, a mass may be palpated adjacent to the cyst, suggesting that a tumor may be present. It is recommended that the minimal excision technique be abandoned for a formal excision and biopsy if a solid tumor is detected. If malignancy is discovered in a cyst wall that is removed at the time of the minimal excision technique, the physician may consider a second excision.

Because malignancy is rarely associated with a cyst, some physicians believe it is not cost-effective to send all epidermoid cyst walls for histologic evaluation. Others believe that all specimens should be sent for evaluation because the literature does note the occurrence of cancer. Certainly any atypical-appearing lesion or one associated with a palpable irregularity in the cyst wall should be sent for histologic analysis.

Many lesions can be confused with epidermoid cysts. If a solid tumor is discovered at the time of the procedure, a biopsy should be obtained. Incisional biopsy can be performed for very large lesions, and excisional biopsy for the smaller lesions. Pilar tumors of the scalp are often confused with epidermoid cysts and may require wide excision because they can erode into the skull.

Simple epidermoid cysts that appear to be completely excised do not generally require follow-up. If a recurrence is brought to the physician’s attention at a later date, standard surgical excision should be attempted.

Procedure Pitfalls/Complications


  • The Contents of the Cyst Sprayed. Vigorous expression of the cyst contents can cause material to literally fly across the room. Gauze should be loosely held over the site to prevent spraying. Masks and eye protection may be needed for the physician, and care should be taken to avoid spraying the nursing personnel. Some physicians use a splatter control shield to avoid this problem.
  • The Cyst Wall Will Not Come Out of the Tiny Incision. Cysts that have previously ruptured or been inflamed may have significant adjacent scarring. The scarring may preclude removal with the minimal excision technique. In addition, less-experienced physicians are often not vigorous enough when compressing the cyst. Pressure applied with the thumbs can loosen the cyst wall from the surrounding tissues. Inability to remove the cyst should prompt the physician to perform a formal excision procedure.
  • The Cyst Wall Breaks During the Procedure. Cyst wall breakage during the procedure may relate to the surgical technique or the anatomic location of the cyst. Cysts on the scalp (trichilemmal cysts, or wens) may have thicker walls than typical epidermoid cysts on the face. Many physicians report that it is easier to remove scalp cysts intact. Thin-walled cysts tend to break and may need to be removed in pieces; however, if adequate kneading of the skin occurs before attempted removal, many cysts can be removed intact.
  • A Blood Clot Developed After Cyst Wall Removal. Removal of large cysts can create a significant open space beneath the skin. Hematomas or infectious material can fill this space. Major bleeding is rarely associated with this procedure, and hematomas can be avoided by having the patient apply firm pressure (using gauze) to the surgical site after the procedure. Direct pressure can also express any clot that may develop at this site.
  • Expressing the Cyst Contents Is Tiring. The minimal excision technique can be physically demanding when performed correctly. Despite the amount of work that is required, this technique can be very gratifying to the physician and patient. Using the thumbs to express the cyst contents produces greater pressure.
  • Cyst Contents Could Not Be Expressed. Solid tumors may masquerade as a typical epidermoid cyst. The pilar cyst or pilar tumor of the scalp can be confused with a typical cyst, and the pilar tumor can invade surrounding tissues. If a solid tumor is suspected during minimal excision, it should be removed by a formal surgical excision and sent for histologic evaluation.
Physician Training


Formal training is needed for the techniques of anesthetic administration, lesion excision, and closure, if it is performed. Most family physicians receive the necessary surgical skills during their residency training. Others could obtain this training with the assistance of an experienced preceptor. Most physicians experienced in skin surgery can perform these procedures unsupervised after three to five precepted procedures.

  1. Avakoff JC. Microincision for removing sebaceous cysts [Letter]. Plast Reconstr Surg. 1989;84:173-4.
  2. Cruz AB, Aust JB. Lesions of the skin and subcutaneous tissue. In: Hardy JD, Kukora JS, Pass HI, eds. Hardy’s Textbook of surgery. Philadelphia: Lippincott, 1983:319–28.
  3. Domonkos AN, Arnold HL, Odom RB. Andrews’ Diseases of the skin: clinical dermatology. 7th ed. Philadelphia: Saunders, 1982.
  4. Foroughi D, Britton P. When is a “wen” a “wen”? A diagnostic dilemma. Br J Plastic Surg. 1984;37:379-82.
  5. Habif TP Clinical dermatology. 2d ed. St. Louis: Mosby, 1990.
  6. Humeniuk HM, Lask GP Treatment of benign cutaneous lesions. In: Parish LC, Lask GP, eds. Aesthetic dermatology. New York: McGraw-Hill, 1991:39–49.
  7. Johnson RA. Cyst removal: punch, push, pull. Skin. 1995;1:14-5.
  8. Klin B, Ashkenazi H. Sebaceous cyst excision with minimal surgery. Am Fam Physician. 1990;41:1746-8.
  9. Morgan RF, Dellon AL, Hoopes JE. Pilar tumors. Plast Reconstr Surg. 1979;63:520-4.
  10. Parlette HL. Management of cutaneous cysts. In: Wheeland RG, ed. Cutaneous surgery. Philadelphia: Saunders, 1994:647–63.
  11. Vogt HB, Nelson RE. Excision of sebaceous cysts: a nontraditional method. Postgrad Med. 1986;80:128-34.
Drainage of Infected Epidermal Cyst Read More
7 year Great Blackhead. Dr Khaled Sadek LipomaCyst

7 year Great Blackhead. Dr Khaled Sadek LipomaCyst

Ten ways to get rid of blackheads

It is not always possible to prevent blackheads, but good cleansing habits, lifestyle tips, and a range of natural and other remedies may help remove them.

Black heads are pinhead-like lesions that affect the face and body. They represent oil plugs that contain dead skin cells, bacteria, and other materials.

Keep reading to learn more.

What is the difference between blackheads, whiteheads, and other types of acne?

How do blackheads form?
A man cleanses his face as a way how to get rid of blackheads.Share on Pinterest
Eva-Katalin / GettyImages

Blackheads formTrusted Source when dead skin cells and oil inside the pore rise and push through the skin’s surface. When these materials interact with the air, they oxidize and turn black, forming a plug.

Doctors also call blackheads open comedones. To treat these, a person needs to use products that break up the oil plug that formed inside the pore. Once they break up the oil plug, preventive methods can help keep blackheads at bay.

Learn more about why blackheads form.

Blackhead removal for the face

Removing blackheads from the face requires a consistent skin care routine using products that can break up the skin-clogging oil inside.

1. Cleanse daily

Daily cleansing is vital to reduce excess oil, dirt, and other materials that can build up, clog pores, and potentially cause blackheads.

One approach that appears to helpTrusted Source is double-cleansing.

First, the person cleanses with an oil-based cleanser to remove makeup and pollutants from the skin.

They follow this with a gentle, water-based cleanser. This removes dirt and oils and prepares the skin for other treatment, such as applying a topical treatment.

2. Apply blackhead-clearing topicals

Topical applications can help break up the oil plug that leads to blackheads. These do take time to work, and a person may have to apply them daily for several weeks before the plug breaks up, reducing the blackhead’s appearance.

Topical applications include:

  • Alpha hydroxy acids (AHAs): These are fruit acids that can encourageTrusted Source exfoliation. Examples include glycolic, mandolin, and lactic acids. These topical applications promote skin peeling and reduce blackheads.
  • Salicylic acid: Salicylic acid comes from the willow tree. It is also a natural peeling agent that can help to peel away pore plugs.
  • Tea tree oil: Tea tree oil has antibacterial and anti-inflammatory properties. In one small studyTrusted Source, 14 people with mild to moderate acne used a gel containing tea tree oil for 12 weeks. The results suggested that products containing tea tree oil can help manage symptoms without severe adverse effects.

Another option is benzoyl peroxide, a topical application that can reduce bacteria and promote peeling.

3. Try a natural blackhead removal mask

Exfoliating scrubs or masks can help remove dead skin cells that may otherwise clog pores and lead to more blackheads.

Oatmeal

According to one article from 2016, colloidal oatmeal has anti-inflammatory, exfoliating, and skin-soothing properties that may help people with eczema. The researchers suggested it could help reduce irritation and manage various skin conditions due to its beneficial effects on the skin barrier. It may help with acne, but there is no specific evidence to confirm this.

4. Facial scrubs

Some people use scrubs to exfoliate the skin in the hope that it will look smoother. For acne, the idea is that the scrub will open up closed comedones and stop them from progressing. However, their abrasive effect may lead to irritation.

Ingredients used in scrubs include:

  • ground fruit pits
  • aluminum oxide
  • sodium tetraborate decahydrate granules
  • polyethylene beads

People should check the ingredients of a scrub before purchasing. ExpertsTrusted Source note that sodium tetraborate decahydrate granules dissolve during washing, making them less abrasive and more suitable than other options for sensitive skin.

Polyethylene beads are a form of microplastic, and they are harmful to the environment.

Here, learn how microplastics get into food and their impact on human health.

Blackhead removal for the body

Blackheads tend to develop on oily parts of the body, including the chest and back. The skin in these places is thicker and less sensitive to treatments, which means a person may need to change their treatment approach slightly.

5. Cleanse the skin daily

Keeping the skin clean and dry can help reduce excess oil in areas of the body where blackheads may develop. The American Academy of Dermatology (AAD) recommends using a body wash that contains benzoyl peroxide.

The AAD recommends purchasing a body wash that contains at least 5.3% benzoyl peroxide. Body washes with up to 10% benzoyl peroxide are available without a prescription. After application, a person leaves it on for at least 2 minutes before rinsing off.

If a person has difficulty reaching their back, they can purchase long-handled brushes or loofahs to help deliver the wash.

6. Use a brush to cleanse and exfoliate

Dry brushing the skin is a natural way to remove dead skin cells that can otherwise clog the pores. Use a natural-bristled brush with a long handle to reach the back, an exfoliating back band, or an extra-long loofah with handles. A person should use a gentler brush for the face than for the body.

Electronic brushes are also available for the skin, although they do not specifically aim to treat acne.

Research carried out by producers of these brushes showed they might be more effective at removing makeup and cleansing the skin than soap and water. A 2019 reviewTrusted Source suggested that they may be a safe and effective way of removing debris from the skin without reducing sebum excessively, but it did not specifically recommend their use for acne.

7. Use sun protection

People often think sun exposure can improve acne, but it can worsen symptoms. It can darken acne and make it last longer. Some acne treatments can also increase sensitivity to ultraviolet (UV) rays from the sun and tanning beds.

Using an oil-free sunscreen can help protect the skin from sunlight.

8. Practice blackhead-friendly habits

Here are some other actions that can help prevent acne, including blackheads:

  • Changing clothes immediately after engaging in any sweat-producing activity, such as being outside or exercising. Sweat that sticks close to the skin can contribute to bacteria buildup.
  • Wearing loose clothing made from natural fibers, such as cotton, that allow the skin to “breathe” and do not create irritating friction.
  • Using a hand-held bag instead of a backpack if acne occurs on the back.
  • Cleansing the skin as soon as possible after sweating.
Other remedies

Some remedies are available over the counter for home use. They are not natural remedies, but they do not need a prescription.

9. Pore strips

Pore strips are a type of adhesive pad that a person places on their skin then pulls away. They aim to remove oil, dirt, and dead skin from the skin’s surface.

They contain a substance known as a cationic adhesive polymer. This binds to the contents of blocked pores and removes them as the person pulls the strip away.

To use a pore strip, a person will:

  1. Wet the skin.
  2. Apply the strip.
  3. Allow to harden.
  4. Peel off.

ExpertsTrusted Source recommend using them once a week and advise people not to use them more than once every 3 days.

10. Over-the-counter topical remedies

Look for topical treatments, such as creams or gels, that contain one or more of the following:

  • benzoyl peroxide, which destroys bacteria and reduces inflammation
  • topical retinoids, such as tretinoin and adapalene, which remove dead skin cells and prevent clogging of the pores
  • azelaic acid, which helps remove dead skin and kill bacteria
  • sulfur, a natural element with antibacterial properties

A person should speak with their doctor or pharmacist about suitable options, which strength to use, and possible adverse effects.

Potential side effects of topical treatments include:

  • skin irritation
  • hypersensitivity to sunlight
  • dry skin

Always follow the instructions on the pack and any advice from the doctor or pharmacist.

A doctor may prescribe topical antibiotics, which help kill bacteria on the skin. Antibiotic creams are only for short-term use, usually 6–8 weeks, to prevent the development of antibiotic resistance.

If these options do not help, they may prescribe a stronger medication. Examples include oral antibiotics, isotretinoin capsules, or co-cyprindiol, which is a hormonal treatment.

What are noncomedogenic products for acne?

Some substances are more likely to block skin pores than others. They have comedogenic properties. Examples include the foaming agent sodium lauryl sulfate, coconut oil, wheat germ, and some algae extracts.

Noncomedogenic products are products that do not contain such substances and are less likely to block the pores. In this way, they may help reduce the risk of acne.

Substances that are relatively less comedogenic and less likely to block the pores include:

  • almond, avocado, olive, and jojoba oils
  • glycerin
  • aloe vera
  • talc

However, this does not mean they can treat acne.

What not to do

Some popular remedies can damage the skin or make acne worse.

Here are some strategies to avoid:

  • Blackhead extractors: These metal or plastic tools have an opening on the end that creates pressure on the pore to remove blackheads. However, they can damage the skin or introduce more bacteria and people should leave them to the professionals.
  • Popping or pressing: Pressing on a blackhead can increase the risk of pain, scarring, more acne, and infection. It also creates an entrance for more oil and bacteria to fill up the pore. Only a dermatologist should remove acne.
  • School glue: Some “online hack” videos and articles recommend using school glue, such as Elmer’s glue, to remove blackheads. However, the glue can clog the pores and may cause allergic reactions.
  • Toothpaste: This has some antibacterial properties, but it also contains substances that can damage or irritate the skin.

Always consider the potential for damage and irritation before using any force or shortcut products on the skin. They can lead to scarring and may make acne worse.

Find more tips here on treating and preventing blackheads.

Summary

Various at-home measures can help manage blackheads. If they do not help after 8 weeks, the AAD recommends seeing a dermatologist.

A doctor can prescribe stronger treatments that may help reduce the appearance of blackheads on the face and body.

7 year Great Blackhead. Dr Khaled Sadek LipomaCyst Read More
Removal of a Squamous Cell Cancer from behind the Ear

Removal of a Squamous Cell Cancer from behind the Ear

Skin Cancer on Ear

Skin cancer on the ear is common. The skin on your outer ear is susceptible to cancer because it’s often exposed to the sun’s damaging UV rays. Symptoms include changes to your skin, like discoloration. Most cases of ear skin cancer are easily treated, but it can spread to other parts of your body if untreated. Treatment includes surgery.

Overview

What is skin cancer on the ear?

Skin cancer on the ear is when abnormal skin cells grow uncontrollably on your ear. It usually begins on the outer part of your ear.

If left untreated, skin cancer on your ear can spread to other parts of your body (metastatic cancer).

Symptoms and Causes

What are the signs of skin cancer on the ear?

A change in the appearance of your outer ear’s skin is the most common sign of skin cancer, including:

  • Change to a sore or mole.
  • Area of discolored skin.
  • Itching or bleeding spot.
  • Pink lump with a hard, scaly surface.
  • Shiny bump or nodule.
  • Sore that doesn’t go away within four weeks.
  • Yellow or white scar-like area.

Use the ABCDE guideline to look for changes on the skin of your ear:

  • Asymmetry: Irregular shape.
  • Border: Hard-to-distinguish, irregular edges.
  • Color: Multiple colors on a mole.
  • Diameter: Bigger than a pencil eraser (six millimeters).
  • Evolution: Getting larger, changing shape, color or size.

What causes skin cancer on the ear?

The most common cause of skin cancer on the ear is overexposure to UV light from the sun. The sun’s UV rays can damage the DNA in your skin, creating abnormal, cancerous (malignant) cells. As the damaged cells rapidly grow and divide, they form a mass of cancer cells.

Contact with some chemicals, like tar and coal, can also cause skin cancer on your ear.

What are the risk factors for skin cancer on the ear?

Your head and face (including your ears) get more sun exposure than other parts of your body. Ultraviolet (UV) rays damage your skin cells. And when you get sunburn or blisters, your risk of developing skin cancer increases even more.

Risk factors for developing skin cancer on your ear include:

Physical characteristics:

  • Have blond or red hair, fair or freckled skin or light-colored eyes.
  • Have many moles or irregularly shaped moles.
  • Sunburn easily and/or have a history of sunburns.

Family and medical history:

  • Family history of skin cancer.
  • Had an organ transplant.
  • Had exposure to UV light therapy as treatment for eczema or psoriasis.
  • Have actinic keratosis (precancerous skin growths that are rough, scaly and dark pink-to-brown).
  • Take medicine that weakens your immune system.

Lifestyle:

  • Are outdoors in the sun often.
  • Live in a sunny or high-altitude climate.
  • Tan outdoors or use tanning beds.

Diagnosis and Tests

How is skin cancer on the ear diagnosed?

To diagnose skin cancer on your ear, a healthcare provider will do:

  • Physical exam: The provider first looks at your outer ear for signs of skin cancer and asks you about any changes to the skin of your outer ear.
  • Biopsy: If the provider suspects cancer, they’ll do a biopsy, removing a small amount of tissue from the abnormal area. They send the tissue sample to a laboratory where a pathologist examines it under a microscope.
  • Imaging:If the biopsy finds that the tissue sample is cancerous, the provider may recommend an MRI or CT scan to see if the cancer has spread. Imaging helps the provider stage the cancer and develop a treatment plan.

Management and Treatment

What treatments are available for skin cancer on the ear?

The goal of treatment for skin cancer on the ear is to destroy the cancer cells while preserving as many healthy cells as possible. Your cancer team will tailor a treatment plan for you, depending on the cancer stage — Stage 0 to Stage IV. The higher the stage, the more the cancer has spread.

For low-stage skin cancer on the ear, a biopsy may be able to remove all of it. Other methods to remove skin cancer include:

  • Excisional surgery: Your surgeon uses a scalpel or razor to remove skin cancer and some surrounding healthy tissue, which ensures all the cancer cells are removed.
  • Curettage and electrodesiccation: This procedure uses an instrument that has a sharp, looped edge. Your surgeon scrapes the instrument across the cancerous area to remove it. Then, they use an electric needle to get rid of any remaining cancer cells.
  • Mohs surgery: During Mohs surgery, your surgeon first removes visible, raised cancerous areas and examines them under a microscope. Then they remove any remaining layers of skin cancer cells, one layer at a time. The surgeon stops when they don’t see any more cancer cells.

Besides surgery, what are other options for removal of skin cancer on the ear?

Other treatment options for skin cancer on the ear include:

  • Chemotherapy.
  • Cryotherapy.
  • Immunotherapy.
  • Photodynamic therapy.
  • Radiation therapy.

Can skin cancer on your ear spread to your brain?

Yes. If undiagnosed and untreated, any skin cancer on your ear can grow and spread. Once in your blood or lymph (fluid that drains into your bloodstream), cancer cells can travel to other organs, including your brain.

Is there a cure for skin cancer on the ear?

Yes. When ear skin cancer is diagnosed early, while it’s in a lower stage, treatment is often successful. Once the cancer has spread, the success of the treatment depends on where (and how much) it has spread.

Prevention

How can I prevent getting skin cancer on my ears?

The best ways to prevent skin cancer on your ears include:

  • Sunscreen: Wearing broad-spectrum sunscreen helps block UV light exposure, but many people forget to apply sunscreen to their outer ear. Apply sunscreen liberally to your ears, just as you would to your face and body. Always use sunscreen when outdoors, even if it’s cloudy.
  • Avoid UV rays: Stay in the shade whenever possible and avoid tanning or using tanning beds.
  • Check yourself: The skin on your ear is a challenging place to look at with your own eyes. Do regular skin checks by using the camera on your phone or asking a loved one to look at your outer ears.

Outlook / Prognosis

What is the outlook for skin cancer on the ear?

When caught early, the outlook for ear skin cancer is good. Treatment can cure most skin cancers if they’re detected before they spread.

Melanoma is the deadliest form of skin cancer. If you have melanoma on your ear, the five-year survival rates are:

  • 99% if it’s detected before it spreads to your lymph nodes.
  • 66% if it has spread to nearby lymph nodes.
  • 27% if it has spread to distant lymph nodes and other organs.

Living With

When should I see my healthcare provider for skin cancer on my ear?

It’s a good idea to see a dermatologist once every year for a full skin review. If you’re worried about the skin on your ear, make an appointment with your healthcare provider or dermatologist, especially if you see:

  • Changes to your skin or the size, shape or color of existing moles or other skin lesions.
  • A new growth on your skin.
  • A wound that hasn’t gone away.
  • Unusual spots on your skin.
  • Areas that itch or bleed.

What questions should I ask my provider?

Coping with a cancer diagnosis is challenging. Talk to your doctor about any questions or concerns you have. Consider asking your provider:

  • What type of skin cancer do I have on my ear?
  • What stage is the skin cancer?
  • Do I need additional tests?
  • How do you plan to treat the skin cancer on my ear?
  • What are the side effects of that treatment?
  • How will I feel throughout treatment?
  • What’s the prognosis for the skin cancer on my ear?
  • Do I have an increased risk of additional skin cancers?
  • How often should I have follow-up checkups?

Additional Common Questions

What are the different types of skin cancer on the ear?

The three main types of skin cancer that can grow on your ear are:

  • Basal cell carcinoma.
  • Squamous cell carcinoma.
  • Melanoma.

Squamous cell carcinoma is the most common cancer diagnosed on the outer ear. While melanoma is less common, it’s considered the deadliest form of skin cancer because it’s more likely to spread to organs beyond your skin. This makes it more difficult to treat and cure.

How common is skin cancer on the ear?

Between 6 and 10 out of 100 skin cancers are ear cancers. That’s 6% to 10% of all skin cancers. Skin cancer is the most common form of cancer diagnosed in the U.S. It affects 20% of Americans at some point in their life.

A note from Cleveland Clinic

Ears are easily exposed to harmful UV rays from the sun, increasing your risk of skin cancer. Do regular skin checks and see your healthcare provider if you notice anything unusual about the skin on your ears. When in doubt, get it checked out. The earlier ear skin cancer is diagnosed, the better the outcome.

Removal of a Squamous Cell Cancer from behind the Ear Read More
Cyst Plot Twist!

Cyst Plot Twist!

Epidermal Inclusion Cyst (Sometimes Called Sebaceous Cyst)

An epidermal inclusion cyst (sebaceous cyst) is a fluid-filled lump under your skin. A keratin substance fills this cyst. It usually doesn’t cause symptoms. Don’t try to pop or remove an epidermal inclusion cyst. A healthcare provider will offer treatment to remove it if it causes discomfort.

What is an epidermal inclusion cyst (sebaceous cyst)?

An epidermal inclusion cyst (epidermoid cyst) is a fluid-filled pocket under the surface of your skin. It looks and feels like a lump or bump on your skin.

Many people call epidermal inclusion cysts “sebaceous cysts.” The term “sebaceous cyst” is misleading because the cyst isn’t filled with sebum. Sebum is an oily substance created by your sebaceous glands that keeps your skin moist. Instead, a keratin (protein) and cell debris substance fill epidermal inclusion cysts.

Most healthcare providers only use the term “sebaceous cysts” when associated with the skin condition known as steatocystoma multiplex. Cysts that form with this condition fill with sebum, so they’re truly “sebaceous cysts.” True sebaceous cysts aren’t common, but epidermal inclusion cysts are.

As the name implies, epidermal inclusion cysts form under the top layer of your skin (epidermis).

How common are epidermal inclusion cysts (sebaceous cysts)?

Epidermal inclusion cysts are the most common type of skin cyst.

What does an epidermal inclusion cyst (sebaceous cyst) look like?

An epidermal inclusion cyst may have the following features:

  • A round bump or dome-shaped lump.
  • A dark dot (punctum) in the center of the cyst.
  • The size ranges from .25 inches to greater than 2 inches. It can grow slowly.
  • Skin discoloration (usually pink to red or darker than your natural skin tone).
  • Tender or warm to the touch.
  • It can move easily.

What are epidermal inclusion cysts (sebaceous cysts) filled with?

A keratin and cell debris substance fills epidermal inclusion cysts. When drained by a dermatologist, this substance looks thick and yellow and has a foul odor.

Is an epidermal inclusion cyst (sebaceous cyst) painful?

An epidermal inclusion cyst isn’t usually painful (asymptomatic). Sometimes, the cyst can inflame (swell) and feel tender when you touch it. As the cyst grows, you may experience skin irritation and pain if it ruptures (breaks open). Occasionally you’ll experience itching at the site of an epidermal inclusion cyst. See your healthcare provider if you develop pain on or near a cyst or have other concerning symptoms.

Where do epidermal inclusion cysts (sebaceous cysts) form?

Epidermal inclusion cysts can form anywhere on your body, but they’re most common on your:

  • Face.
  • Chest.
  • Back.
  • Scalp
  • Neck.
  • Legs.
  • Arms.
  • Genitalia.

What causes an epidermal inclusion cyst (sebaceous cyst)?

Epidermal inclusion cysts form after a blockage to a hair follicle (an opening in your skin where hair grows out) at the follicular infundibulum (the top part of the hair follicle).

Your body naturally sheds skin cells when they reach the end of their life cycle. If you have a skin injury like a scratch, surgical wound or a skin condition like acne or chronic sun damage, it can disrupt the path your skin cells take to leave your body. This traps these cells and other components like keratin, so they collect under the surface of your skin. This is how a cyst forms.

On areas of your body where you don’t have hair follicles, a cyst can form after an injury or trauma to your skin, too. The injury pushes your skin cells below the top layer of your skin into the second layer (dermis). This creates a pocket where keratin collects and forms a cyst.

What are the risk factors for epidermal inclusion cysts (sebaceous cysts)?

Although they can appear at any age, epidermal inclusion cysts most frequently occur between ages 20 to 60. Epidermal inclusion cysts rarely appear before puberty. They’re more common among people assigned male at birth (AMAB) than people assigned female at birth (AFAB).

Some rare genetic conditions and other conditions lead to the development of multiple epidermal inclusion cysts:

  • Gardner syndrome (familial adenomatous polyposis).
  • Gorlin syndrome (basal cell nevus syndrome).
  • Favre-Racouchot syndrome.
  • Human papillomavirus (HPV).

Certain medications may increase your risk of developing epidermal inclusion cysts, including:

  • BRAF inhibitors.
  • Imiquimod.
  • Cyclosporine.

Is an epidermal inclusion cyst (sebaceous cyst) contagious?

No, epidermal inclusion cysts aren’t contagious.

What are the complications of an epidermal inclusion cyst (sebaceous cyst)?

Complications of an epidermal inclusion cysts may include:

  • Inflamed epidermal inclusion cyst: The cyst is swollen and tender.
  • Infected epidermal inclusion cyst: Your body is fighting harmful bacteria within the cyst, which causes swelling, pain and skin discoloration.
  • Ruptured epidermal inclusion cyst: The cyst breaks open, which causes swelling, pain, skin discoloration and yellow (often stinky) fluid drainage.

Is an epidermal inclusion cyst a sign of cancer?

Epidermal inclusion cysts are rarely harmful. However, researchers found rare cases where malignancy (cancer) formed within the cyst, specifically:

  • Squamous cell carcinoma.
  • Basal cell carcinoma.

An epidermal inclusion cyst may be concerning if it has any of the following characteristics:

  • Signs of infection, including pain, skin discoloration, swelling and/or drainage.
  • A fast rate of growth.
  • A diameter larger than 5 centimeters.

Talk to your healthcare provider if you notice changes to your skin.

Diagnosis and Tests

How is an epidermal inclusion cyst (sebaceous cyst) diagnosed?

A healthcare provider can diagnose an epidermal inclusion cyst during a physical exam simply by looking at it and learning more about your symptoms if you have any.

Although not usually necessary, testing can confirm a diagnosis. It may include:

  • Epidermal inclusion cyst radiology or imaging tests: An ultrasound may help determine the contents of the cyst. A CT scan (computed tomography scan) can confirm the diagnosis of a large epidermal inclusion cyst and help your provider determine the best plan for removal.
  • A punch biopsy: A provider will remove a small amount of the tissue from the cyst to examine it.

Should I see a specialist for an epidermal inclusion cyst?

If you notice changes to your skin, contact a healthcare provider. You might start with a primary care physician (PCP), and they can refer you to see a dermatologist or a doctor who specializes in skin conditions. Only certain providers can remove epidermal inclusion cysts. Your provider may refer you to a specialist trained to remove cysts, such as a dermatologist, general surgeon or plastic surgeon.

Management and Treatment

How is an epidermal inclusion cyst (sebaceous cyst) treated?

In many cases, a healthcare provider may recommend monitoring the epidermal inclusion cyst and not treating it if it doesn’t cause symptoms.

If the cyst swells and/or causes discomfort, use a warm compress over the cyst to reduce symptoms at home. If your symptoms continue or get worse, contact a provider. They may recommend removing it or they’ll inject a steroid medication into the cyst to temporarily reduce swelling.

Antibiotics can treat an inflamed or infected epidermal inclusion cyst.

Epidermal inclusion cyst (sebaceous cyst) removal

Your provider may remove the epidermal inclusion cyst with the following procedures:

  • Incision and drainage: Your provider will make a small opening over the cyst and release the collection of fluid within the cyst. This procedure won’t resolve the cyst since your provider won’t remove the cyst capsule (the outer portion of the cyst). This can help with inflammation and swelling.
  • Surgical excision: A surgical procedure that removes the cyst. This procedure uses a local anesthetic (you won’t be asleep and you won’t feel pain). The removal of the capsule (the outer portion of the cyst) prevents the cyst from growing back.

Don’t try popping or draining the cyst yourself. This could cause an infection, and the cyst will likely grow back (recur).

Are there side effects of the treatment?

Risks of surgical excision of a cyst are rare but may include:

  • Infection.
  • Bleeding.
  • Scars.
  • Pain.
  • Recurrence.

Prevention

Can an epidermal inclusion cyst (sebaceous cyst) be prevented?

Epidermal inclusion cysts typically form randomly. However, avoiding injury or trauma to your skin and treating skin conditions may be helpful to reduce your risk.

Outlook / Prognosis

What’s the outlook for an epidermal inclusion cyst (sebaceous cyst)?

Once you have a diagnosis, you can wait and see if the cyst improves on its own or discuss treatment options with your healthcare provider.

Most cysts don’t cause symptoms. But, it can be challenging if your cyst forms on a very visible part of your body, like on your face or scalp, or if it causes pain. Talk to a healthcare provider about cyst removal if the cyst is bothersome.

Does an epidermal inclusion cyst (sebaceous cyst) go away?

Some cysts decrease in size, while others continue to grow until you get treatment. Without treatment, you may have the cyst for the rest of your life.

Can epidermal inclusion cysts get worse?

Epidermal inclusion cysts sometimes remain small in size and asymptomatic for several years. However, they can also increase in size and may become uncomfortable or irritated. If the cyst bothers you, discuss treatment options with your healthcare provider.

Living With

When should I see a healthcare provider?

Always see your healthcare provider if you find a lump on your skin. It might be an epidermal inclusion cyst, another type of cyst or something else. Don’t try to diagnose it yourself. See your healthcare provider for a clear diagnosis and specialized treatment.

What questions should I ask my healthcare provider?

You may want to ask your provider:

  • Do I have an epidermal inclusion cyst or another type of cyst?
  • Will this go away on its own, or will it need treatment?
  • Do you think the epidermal inclusion cyst will get bigger?
  • What treatment options do you recommend?
  • Do I need to see a specialist or a surgeon?
  • What should I do if the cyst comes back after the procedure?

Additional Common Questions

Is an epidermal inclusion cyst (sebaceous cyst) dangerous?

Most epidermal inclusion cysts aren’t dangerous. They’re usually asymptomatic. Not all epidermal inclusion cysts become infected, but infection is possible. Infections can be dangerous if left untreated. While very rare, some cysts can turn into cancer, so contact a healthcare provider if you notice changes to your skin.

A note from Cleveland Clinic

You may feel scared or anxious after finding a new lump or bump on your skin. The lump may be a harmless epidermal inclusion cyst or it may be a more serious diagnosis. Contact your healthcare provider as soon as you notice changes to your skin. They’ll give you an official diagnosis and answer any questions or concerns you have.

Treatment isn’t always necessary with epidermal inclusion cysts, but you may feel more comfortable if a provider removes it. Don’t try popping or draining the cyst at home. This could lead to an infection. Your healthcare provider will drain the cyst safely, so you don’t have to worry.

Cyst Plot Twist! Read More